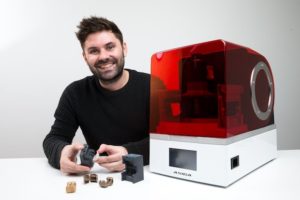
 Low-cost desktop injection moulding – here, Mitchell Brown from VERT Design, explains how they did it using Asiga‘s desktop 3D printing solution.
Our product design company was engaged to develop a variation of a hose clip that is used on a high speed production line.
The product works through the use of an integral hinge and flexible clipping geometry.
Traditionally we would test the design through the used of SLS 3D printed models, however, the results achieved were not accurate.
We required the geometry to be proven in the actual production materials, which in this case was injection moulded polypropylene
Through the design phase, we developed multiple iterations. Eventually this was short-listed to two possible concepts.
Producing a prototype tool in steel or aluminium wo, ld have cost many thousands of dollars and taken a minimum of 6 weeks.
We turned to 3D printed tooling as it was faster and cheaper.
Production of the moulding tool
We designed the tooling ourselves.
Features like a smooth parting line, interlocking geometry and adequate venting were used to ensure that parts could be successfully moulded.
We printed the tooling on an Asiga Pro2 3D printer in Asiga FusionGRAY high temperature resin.
Asiga 3D printers employ a build process which actively forms fine layers of resin through a sliding action termed “Slide-And-Separate” (SAS).
This gives them a unique property amongst inverted stereolithography systems of being able to print large cross-sectional areas quickly in precise layer thicknesses, which is highly applicable to the geometry of injection mould tooling.
We were able to print tools of excellent surface finish at 25 microns layer thickness in the FusionGRAY material which is rated to operate above 200 degrees Celsius, sufficient for injection moulding polypropylene.
A rudimentary metal mould ring was adapted to the printed tooling.
This ensured that the nozzle was not in direct contact with the 3D printed tool where it could cause physical damage and/or degradation.
Initially we cycled a material with a high mould-flow index.
This allowed us to check that the tool could be properly filled and de-moulded. Once we achieved fully formed parts we switched to polypropylene.
The machine we used is hand operated and a cycle usually takes 30 seconds from loading the tool to de-moulding a part.
When we observed that parts were not fully forming we applied a thin layer of mould release spray that allowed the material to fill the mould with greater ease.
In between cycles we used compressed air to cool the tool as heat is absorbed from the molded plastic.
This is to prevent damage to the tool.
Quality of the mouldings
Using a hand operated moulding machine we were able to produce parts of excellent quality.
The surface finish achieved was similar to a fine EDM finish found in steel production tools.
At times we noticed visible flow lines, voids from trapped gas, flashing and noticeable gate remains.
Flashing and gate remains were trimmed by hand to clean up moulded parts.
That said, it is possible to achieve cleaner parts with better process control and stable material temperature.
Condition of tooling after moulding
The FusionGRAY tooling material can wear if not treated with care.
Controlled processing of the tool is necessary due to the significant hydraulic pressures involved and over-filling cavities can destroy the tool.
In addition, over-clamping can also fracture weak points in the tool. In the course of cycling the tool in our project we noticed a hair-line crack form, however, this did not compromise the performance of the tool.
Protection of the tool can be improved through the used of a metal bolster so that the clamping pressure is taken by the bolster rather than the 3D printed inserts.
Comparison to other 3D printers
We have previously tested digital tooling produced with other 3D printers.
In my experience, FusionGRAY displays greater integral strength and produces a smoother tool surface with little to no stepped build-lines being transferred to the moulded part.
Conclusion
The use of 3D printed tooling in tandem with low pressure moulding machines in our design studio has enabled us quickly manufacture real injection moulded parts at low-cost.
We have been able to validate potential designs as well as produce low-volume runs of components in real engineering plastics.


